Posted on  Updated on 

室外组二代车上手记录

碎碎念

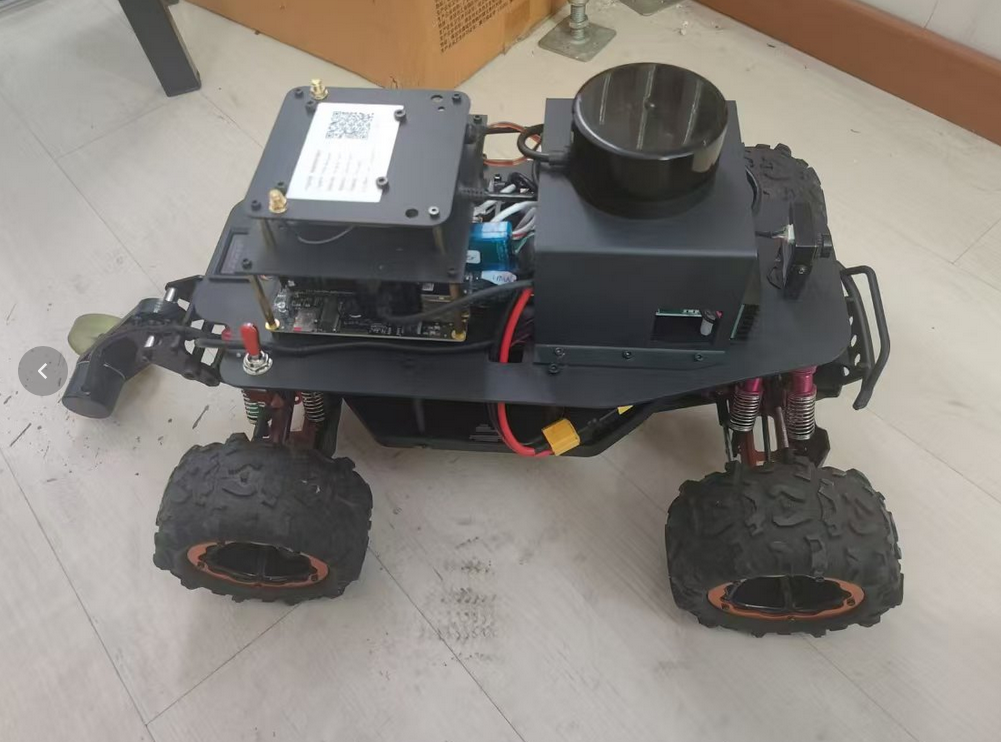
8月5号拿到室外组二代新车,人有点麻,一方面比赛日期临近,而且二队还没有车。
新车上手后,发现问题很多,首先是密码登不上去,车的所有USB端口都被占满,而且昇腾310的板没有内置wifi,300块的树莓派都有wifi,他没有,而且系统是Ubuntu22(魔改版,单内核)的,只有这个版本的镜像,这导致无法在原生环境跑ros1,
赛事方给出的解决方法是在root用户在跑linux容器,容器为ubuntu20,在此跑ros,然后通过与用户ubuntu20的电脑使用ros的主从机和ssh连接实现远程部分可视化操作
我的评价是,脑残,傻逼操作,垃圾昇腾上位机板卡没wifi,支持的镜像也少,官网查询板卡资料,还带锁,各种注册,还要序列号申请,垃圾板卡,狗都不用。工控机都比他强
碎碎念结束,不管这么说,比赛还是要继续的。

vim常见命令及操作

首先,关闭大写锁定,切换为英语小写模式

基础操作

  • 进入文件 vim 文件名,文件不存在会创建文件
  • 按a或i进入编辑模式,此时左下方显示 –INSERT–,o新增加一行,进入编辑模式
  • 输入文本,后按Ese退出编辑模式,输入:,进入命令行模式
  • q为不保存退出,wq为保存退出
  • shift+i,在此行最前面加内容,shift+a,在此行最后面就内容
  • 普通模式输入gg,光标回到起头,输入shift+g,光标回到最后

配置

小插曲,突然发现图床用不了了,检查发现系统时间用问题,更新一下就可以了,时间问题是因为双系统切换导致的,具体原因不明

  • 输入 vim –version

  • 打开其中的$HOME/.vimrc
    Vim $HOME/.vimrc

  • 增加set number
    vim显示行号

进阶操作

  • gg-到第一行
  • shift + g 最后一行
  • yy-复制当前行
  • dd-删除当前行
  • u-撤销前次操作
  • .重复前次操作
  • / 搜索
  • :/%s/原单词/新单词/g

zip常见操作

zip的安装,打开终端输入下面两行,安装 zip 和 unzip

1
2
sudo apt update
sudo apt install zip unzip

基本创建

1
2
3
4
5
zip archive_name.zip file1 file2
# 这个命令将 file1 和 file2 压缩到一个名为 archive_name.zip 的ZIP文件中

zip -r archive_name.zip directory_name
# 使用 -r 选项可以递归地将整个目录(包括其子目录和文件)压缩到ZIP文件中。

解压ZIP文件

1
2
3
4
5
6
7
8
unzip archive_name.zip
# 这个命令将 archive_name.zip 文件中的所有内容解压到当前目录。

unzip archive_name.zip -d destination_directory
# 使用 -d 选项可以将ZIP文件的内容解压到指定的目录 destination_directory 中。

unzip -o archive_name.zip
# 使用 -o 选项将覆盖现有的文件。

linux系统操作命令行

1
2
3
4
5
6
7
8
9
10
11
12
13
14
15
16
17
18
19
20
21
22
23
24
25
26
27
28
29
30
31
32
33
34
# 过于基本的就略过了

mkdir directory_name
创建目录

rm -r directory_name
删除非空目录

cp source_file destination_file
复制文件或目录

mv source_file destination_file
移动文件或目录

mv old_name new_name
重命名文件

chmod -R 777 /path/to/directory
赋予文件夹下所有文件777权限

ps
显示当前用户的进程

top
实时显示系统进程

uname -a
显示系统信息

free -h
显示内存使用情况

du -sh [目录]
显示指定目录的磁盘使用情况

与功能包安装及下载相关

1
2
3
4
5
6
7
8
9
10
11
12
13
14
15
16
17
18
19
首先检查网路,并且检查时间的准确性
ping baidu.com


sudo apt-get update
更新包列表

sudo apt-get install [包名]
安装软件包

sudo apt-get remove [包名]
卸载软件包

sudo apt update
更新源

sudo apt install ros-版本-库名
ros相关包安装,版本有noetic,等

ros车设置

新车实录

警告1,所有的端口定义与官方给的教程并不相同,而且雷达端口在车辆启动后拔插会导致该端口丢失。所以开机后不要尝试拔插雷达口,所有USB接口已用小标签标注

警告2,由于升腾的板卡没有WiFi模块,所以通过拓展坞插上网口,连接有网的路由器后,还需要拔掉车载路由器与板卡的网线,否则没有网

警告3,小车的ROS相关进程需要在固定IP下才能运行,该固定IP是由车载路由器固定,也就是说在通过网卡联网时,ROS相关程序会报错,找不到IP之类的,秉持有用就不折腾的原则,ROS关于IP的配置文件就不更改了,后来者自行调整。

室外组上手

镜像

前期准备

打开车和电脑从机,电脑链接下车wifi

终端链接,密码Mind@123
打开VScode,远程链接小车主机

建图

将车放在出发区,位置要记住
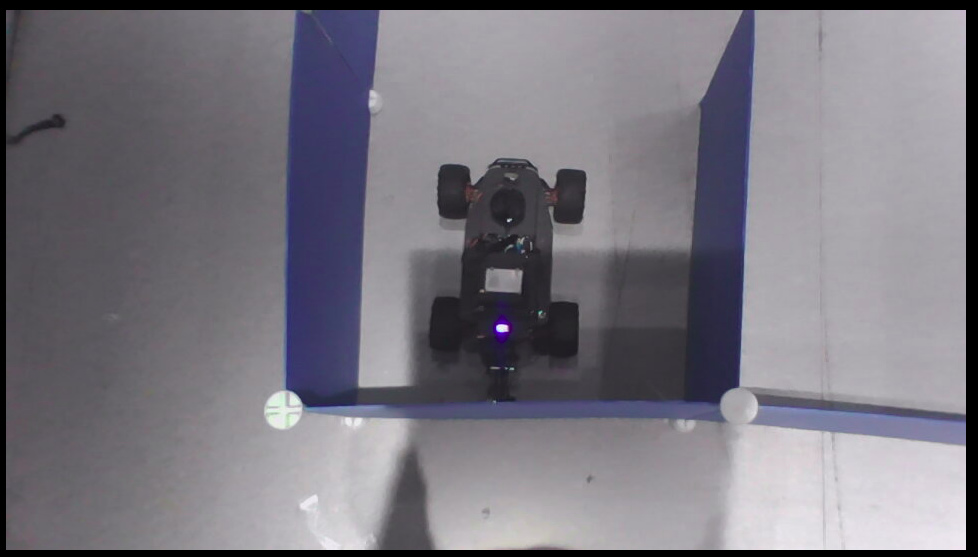
在终端出运行

python3 /racecar/src/auto_car/scripts/map_wj.py
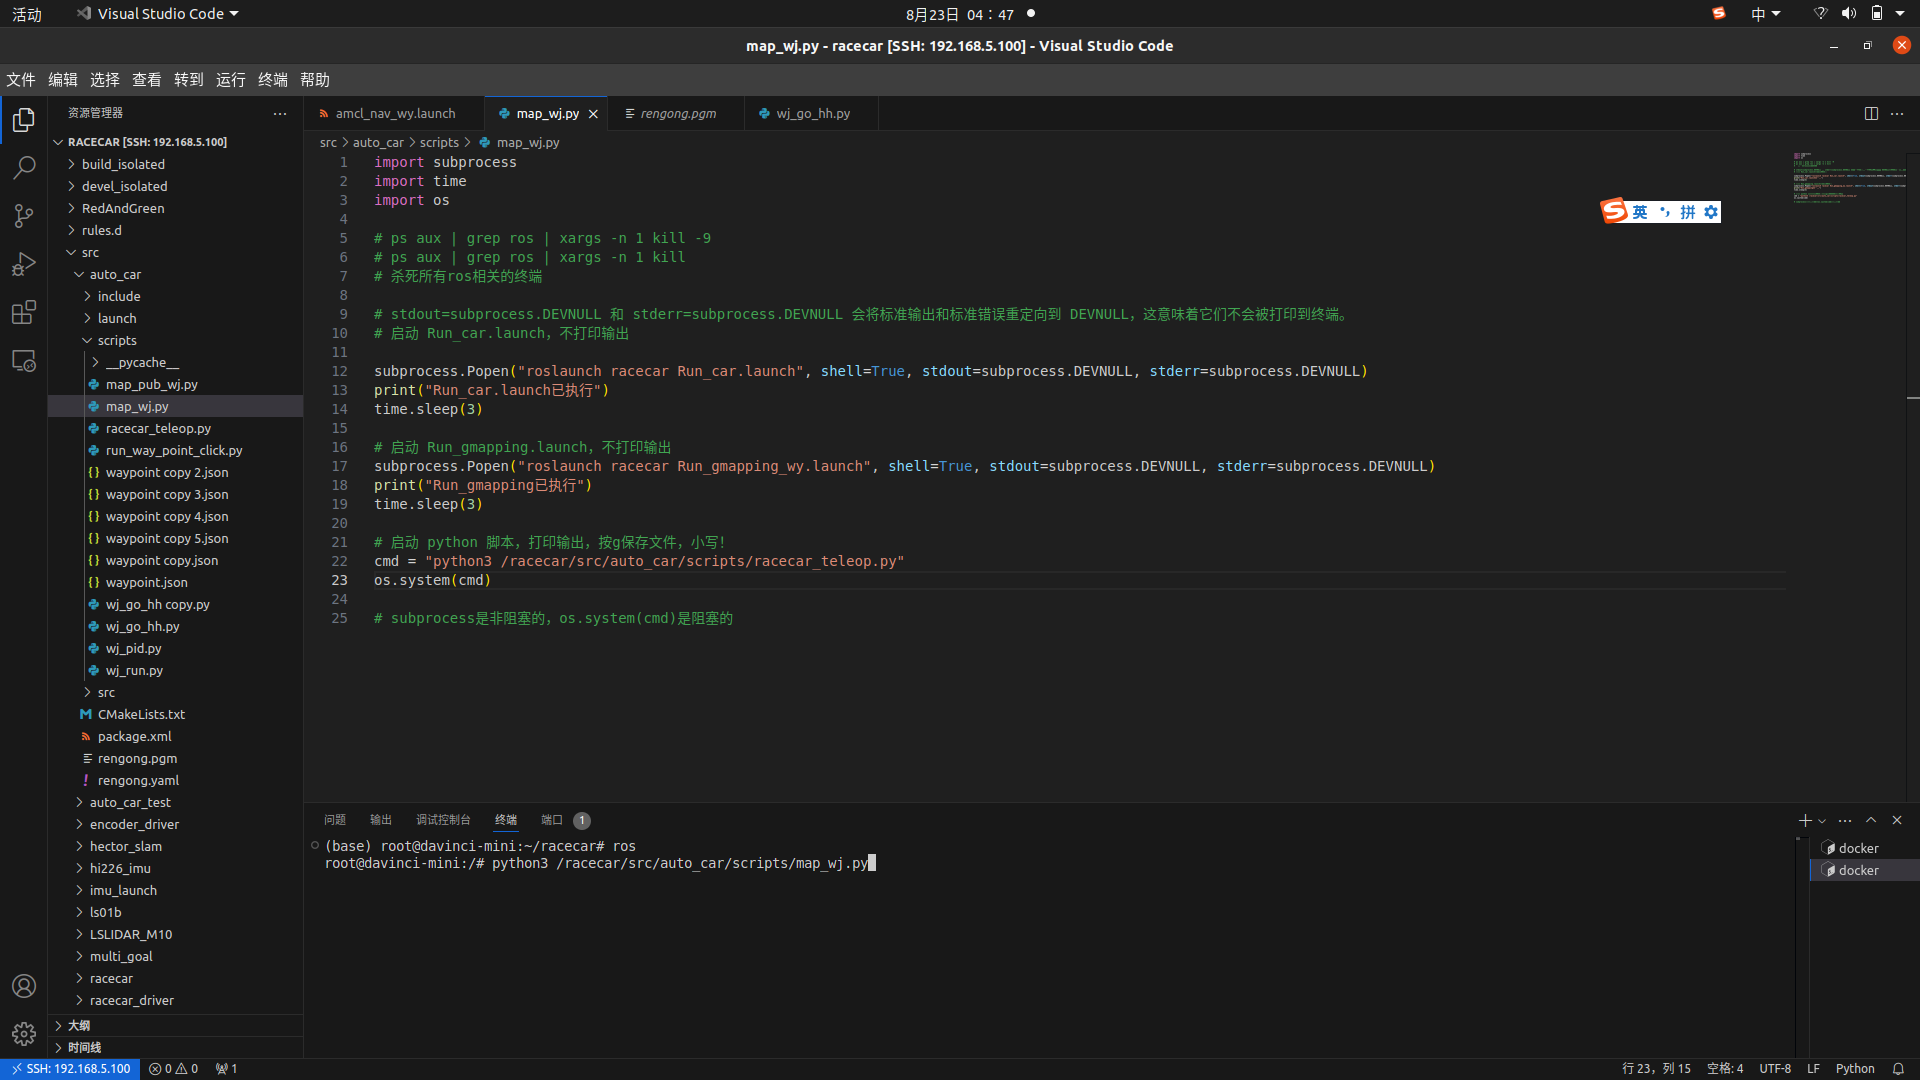
运行前打开底盘,运行后,底盘控制小车建图,建完图后,在键盘控制的终端里按g保存地图

打点

建完图后,vscode重开一个终端

python3 /racecar/src/auto_car/scripts/run_way_point_click.py
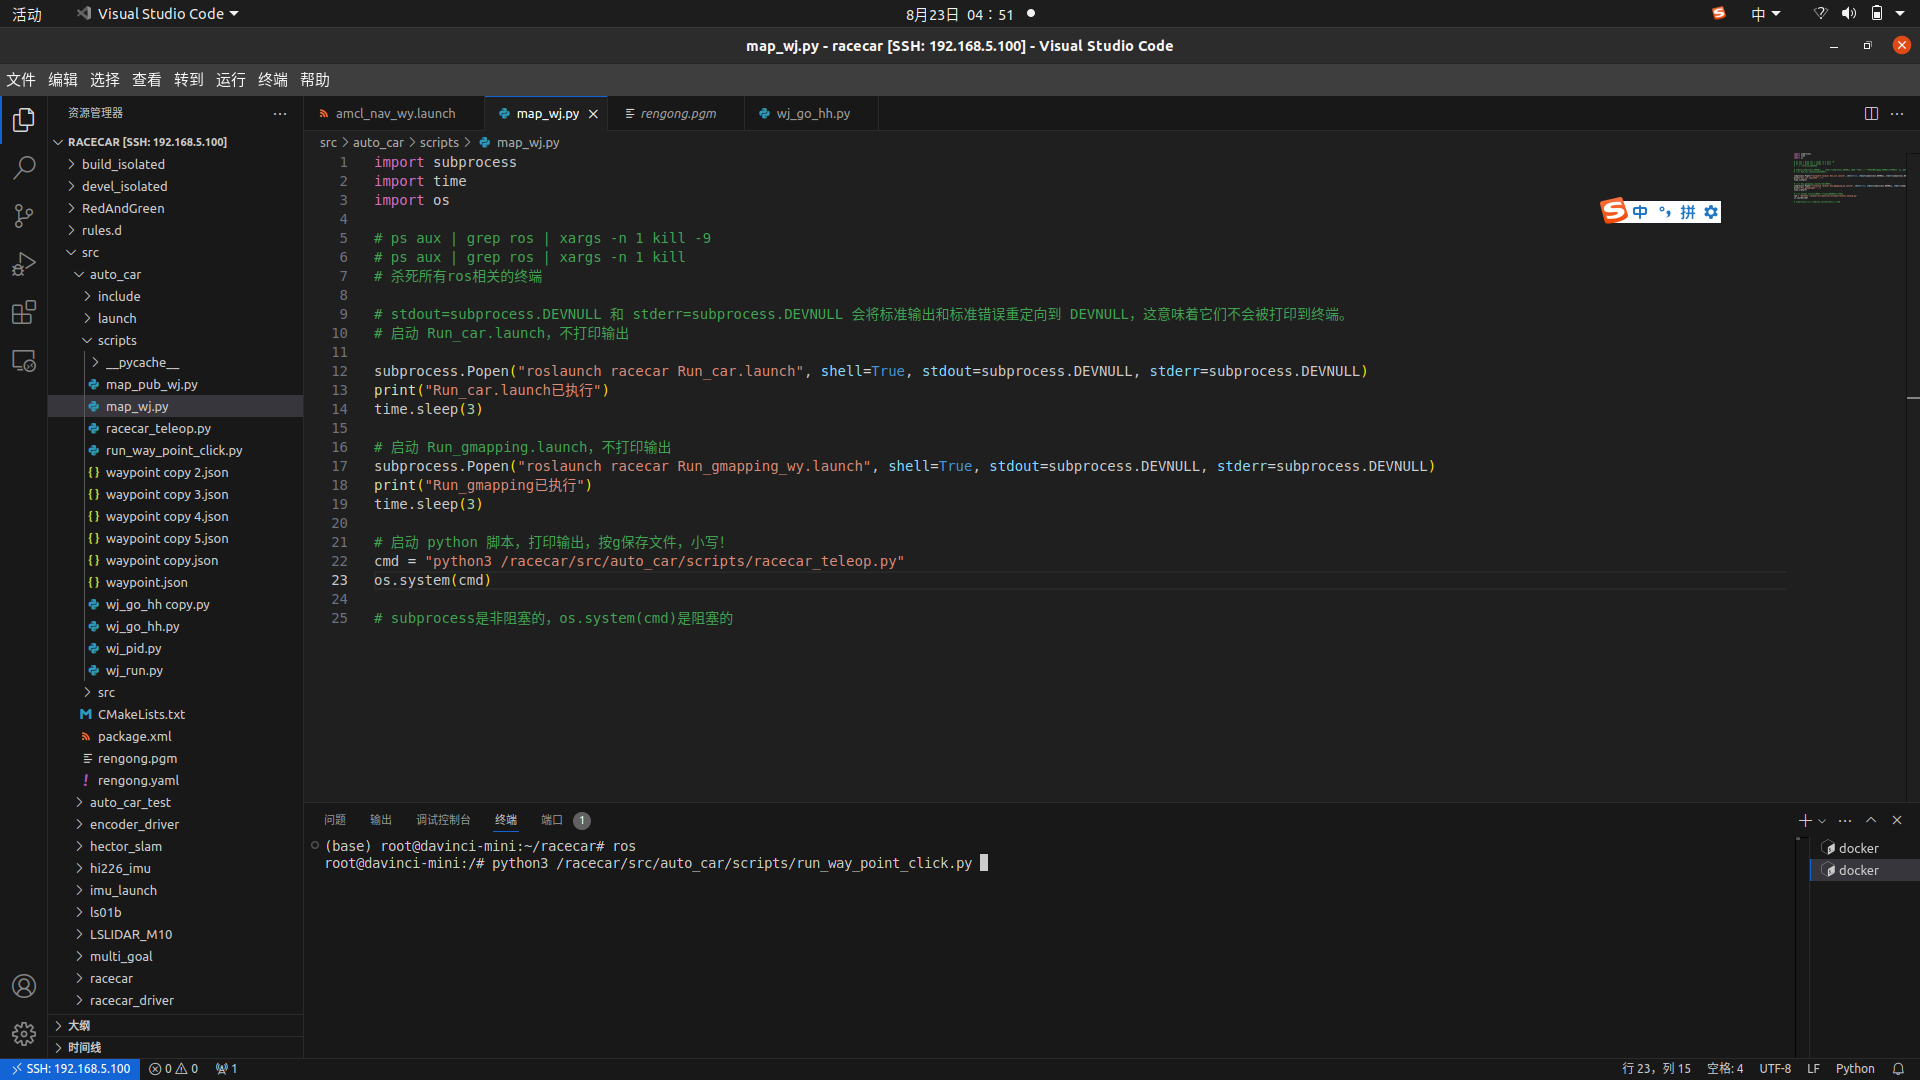
运行后输入1或2回车,打开从机的rviz,挂载rviz.rviz

如何挂载rviz,点击file,点击rencent config,选择rviz.rviz,如果你是第一次打开,点击open config 在rviz(已经放在代码文件下)文件夹中找到rviz.rviz

点击2D Nav Goal开始打点,打完点后,再次点击2D Nav Goal,使点位与最后一个重合,终端窗口显示,保存成功。

如果选择的是1,可以点击PUBlish Point ,点击空白处,显示之前打的点位,点击publish Point,点击要更改的点,点击

红绿灯与斑马线停车点位修改
修改
start_light_post ,white_go,while_back

开跑

将车放在起始点,运行

python3 /racecar/src/auto_car/scripts/wj_run.py
打开rviz,配置文件选择acml_rviz.rviz
在python3 /racecar/src/auto_car/scripts/wj_run.py代码下的终端回车,车辆开跑。

速度更改vp_min
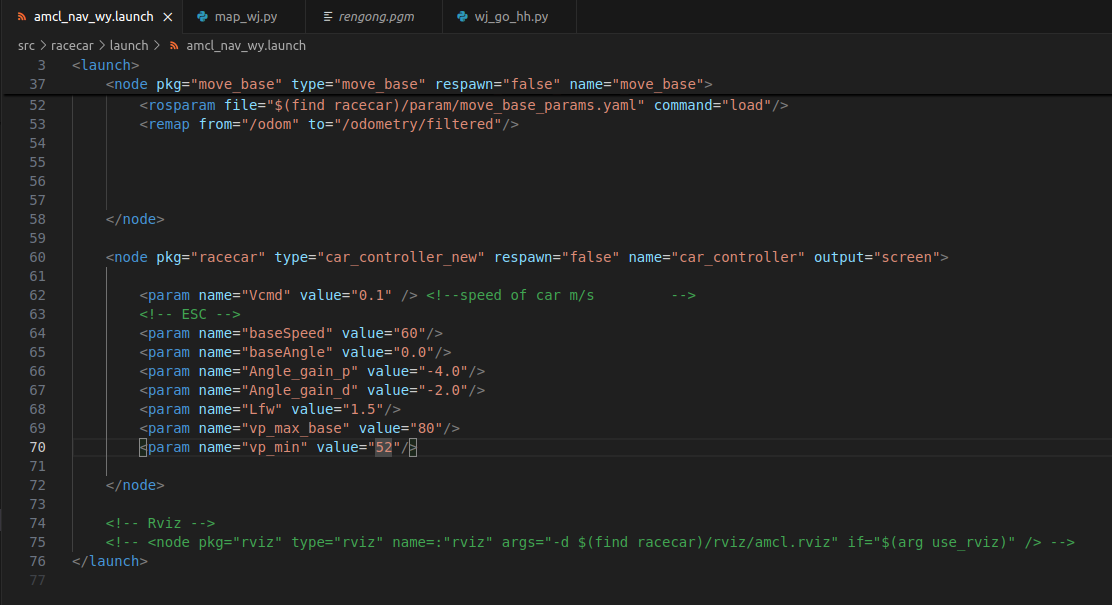
跑的不好的话,更改点位,再次跑

代码讲解

代码分为3个部分,建图,打点,启动
代码程序总结构

建图代码

map_wj.py

文件map_wj.py,这个代码是建图文件总得启动代码,主要启动两个roslaunch节点和一个python文件。
其中使用subprocess库可以方便在该文件在命令行窗口启动其他窗口,subprocess是非阻塞,打开后和在命令行窗口运行的本程序失去关系,无法通过关闭命令行窗口的方式关闭其打开的其他程序,所以需要使用
ps aux | grep ros | xargs -n 1 kill -9 关闭其打开的其他程序,主要是ros程序。
在建图方面主要做的工作是将多个命令集成到一个python文件中,方便操作。

1
2
3
4
5
6
7
8
9
10
11
12
13
14
15
16
17
18
19
20
21
22
23
24
import subprocess
import time
import os

# ps aux | grep ros | xargs -n 1 kill -9
# 杀死所有ros相关的终端

# stdout=subprocess.DEVNULL 和 stderr=subprocess.DEVNULL 会将标准输出和标准错误重定向到 DEVNULL,这意味着它们不会被打印到终端。
# 启动 Run_car.launch,不打印输出

subprocess.Popen("roslaunch racecar Run_car.launch", shell=True, stdout=subprocess.DEVNULL, stderr=subprocess.DEVNULL)
print("Run_car.launch已执行")
time.sleep(3)

# 启动 Run_gmapping.launch,不打印输出
subprocess.Popen("roslaunch racecar Run_gmapping_wy.launch", shell=True, stdout=subprocess.DEVNULL, stderr=subprocess.DEVNULL)
print("Run_gmapping已执行")
time.sleep(3)

# 启动 python 脚本,打印输出,按g保存文件,小写!
cmd = "python3 /racecar/src/auto_car/scripts/racecar_teleop.py"
os.system(cmd)

# subprocess是非阻塞的,os.system(cmd)是阻塞的

Run_gmapping_wy.py

Run_gmapping_wy.py这个是gmapping建图的配置文件,可以通过这个文件改变建图的大小,分辨率,雷达有效范围等

1
2
3
4
5
6
7
8
9
10
11
12
13
14
15
16
17
18
19
20
21
22
23
24
25
26
27
28
29
30
31
32
33
34
35
36
37
38
39
40
41
42
43
44
45
46
47
48
49
50
51
52
53
54
55
56
<?xml version="1.0"?>

<launch>

<!-- <arg name="use_rviz" default="true" /> -->

<!-- ODOMETRY -->
<!--rf2o_Laser_Odometry-->
<include file="$(find racecar)/launch/includes/rf2o.launch.xml" />
<!-- wheel odometry -->
<include file="$(find encoder_driver)/launch/wheel_odom.launch"/>

<!-- Robot_Localization -->
<node pkg="robot_localization" type="ekf_localization_node" name="ekf_se" clear_params="true">
<rosparam command="load" file="$(find racecar)/param/ekf_params.yaml" />
</node>

<!-- gmapping -->
<node pkg="gmapping" type="slam_gmapping" name="slam_gmapping" output="screen">
<remap from="scan" to="scan"/>
<param name="map_update_interval" value="2"/>
<param name="maxUrange" value="4"/>
<param name="sigma" value="0.05"/>
<param name="kernelSize" value="1"/>
<param name="lstep" value="0.05"/>
<param name="astep" value="0.05"/>
<param name="iterations" value="5"/>
<param name="lsigma" value="0.075"/>
<param name="ogain" value="3.0"/>
<param name="lskip" value="0"/>
<param name="srr" value="0.1"/>
<param name="srt" value="0.2"/>
<param name="str" value="0.1"/>
<param name="stt" value="0.2"/>
<param name="linearUpdate" value="0.10"/>
<param name="angularUpdate" value="0.25"/>
<param name="temporalUpdate" value="1.0"/>
<param name="resampleThreshold" value="0.25"/>
<param name="particles" value="30"/>
<param name="xmin" value="-50.0"/>
<param name="ymin" value="-50.0"/>
<param name="xmax" value="50.0"/>
<param name="ymax" value="50.0"/>
<param name="delta" value="0.05"/>
<param name="llsamplerange" value="0.01"/>
<param name="llsamplestep" value="0.01"/>
<param name="lasamplerange" value="0.005"/>
<param name="lasamplestep" value="0.005"/>
<param name="odom_frame" value="odom"/>
<param name="base_frame" value="base_footprint"/>
</node>

<!-- Rviz -->
<!-- <node pkg="rviz" type="rviz" name="rviz" args="-d $(find racecar)/rviz/gmapping.rviz" if="$(arg use_rviz)"/> -->

</launch>

Run_car.launch

这个代码是底盘控制代码,开启这个代码能够开启上位机ros对下位机发送速度指令,下车速度话题名为car/cmd_vel,其他话题运行该launch文件后,使用rostopic list 查看

racecar_teleop.py

这是一个键盘控制小车移动的代码,具体操作键见具体代码
在官方代码里补充了一个按g,保存地图到指定位置的代码行

1
2
3
4
elif key == 'g' :
cmd = "rosrun map_server map_saver -f /racecar/src/auto_car/rengong"
os.system(cmd)
break

打点

run_way_point_click.py,该程序实现的功能是通过订阅rviz发布的点位将其储存到配置文件中,启动实跑时,将点位发布出去,实现导航

1
2
3
4
5
6
7
8
9
10
11
12
13
14
15
16
17
18
19
20
21
22
23
24
25
26
27
28
29
30
31
32
33
34
35
36
37
38
39
40
41
42
43
44
45
46
47
48
49
50
51
52
53
54
55
56
57
58
59
60
61
62
63
64
65
66
67
68
69
70
71
72
73
74
75
76
77
78
79
80
81
82
83
84
85
86
87
88
89
90
91
92
93
94
95
96
97
98
99
100
101
102
103
104
105
106
107
108
109
110
import os
import rospy
from geometry_msgs.msg import PointStamped, PoseStamped
from nav_msgs.msg import Path
from scipy.interpolate import splprep, splev
import numpy as np
import json
from visualization_msgs.msg import Marker, MarkerArray
import time
import subprocess

print("是否加载历史json文件: \n 1.是 2.否,丢弃旧数据\n请输入数字1或2:")
data = []
clicked_point = -1
number = input()
if number == "1":
with open('/racecar/src/auto_car/scripts/waypoint.json',"r") as f:
data = json.load(f)["waypoint"]
f.close()

# os.system(f"gnome-terminal -e 'bash -c \"roslaunch /home/racecar/car_2024_rengong/src/auto_go/launch/path_click.launch; exec bash\"'")
subprocess.Popen("roslaunch /racecar/src/auto_car/launch/path_click.launch", shell=True, stdout=subprocess.DEVNULL, stderr=subprocess.DEVNULL)
rospy.sleep(3)
rospy.init_node('way_point_click', anonymous=True)


# 在rviz里显示箭头
def show_arrow():
global clicked_point,data
marker_array = MarkerArray()
for i,d in enumerate(data):
marker = Marker()
marker.header.frame_id = "map"
marker.type = marker.ARROW
marker.action = marker.ADD
marker.ns = "marker"
marker.scale.x = 0.5
marker.scale.y = 0.1
marker.scale.z = 0.1
marker.color.a = 1.0
marker.color.r = 0.0
marker.color.g = 1.0
marker.color.b = 0.0
if i==clicked_point:
marker.color.r = 1.0
marker.color.g = 0.0
marker.color.b = 0.0
marker.pose.position.x = d[0]
marker.pose.position.y = d[1]
marker.pose.position.z = 0.0
marker.pose.orientation.w = d[2]
marker.pose.orientation.x = d[3]
marker.pose.orientation.y = d[4]
marker.pose.orientation.z = d[5]
marker_array.markers.append(marker)
id = 0
for m in marker_array.markers:
m.id = id
id += 1
marker_pub.publish(marker_array)

def click_goal_callback(msg):
global data, clicked_point
if clicked_point==-1:
if len(data)>0 and (msg.pose.position.x-data[-1][0])**2 + (msg.pose.position.y-data[-1][1])**2 < 0.1:
# 保存数据
with open('/racecar/src/auto_car/scripts/waypoint.json',"w") as f:
json.dump({"waypoint":data},f)
f.close()
print("保存成功")
return
data.append([msg.pose.position.x,msg.pose.position.y,msg.pose.orientation.w,msg.pose.orientation.x,msg.pose.orientation.y,msg.pose.orientation.z])
else:
data[clicked_point][0] = msg.pose.position.x
data[clicked_point][1] = msg.pose.position.y
data[clicked_point][2] = msg.pose.orientation.w
data[clicked_point][3] = msg.pose.orientation.x
data[clicked_point][4] = msg.pose.orientation.y
data[clicked_point][5] = msg.pose.orientation.z
clicked_point = -1
show_arrow()

def clicked_callback(msg):
# 寻找最近的点
global data, clicked_point
x = msg.point.x
y = msg.point.y
if len(data) == 0:
return
min_dis = 100000
min_index = 0
for i in range(len(data)):
dis = (x-data[i][0])**2 + (y-data[i][1])**2
if dis < min_dis:
min_dis = dis
min_index = i
if min_dis<0.1:
clicked_point = min_index
else:
clicked_point = -1
show_arrow()


marker_pub = rospy.Publisher("/my_marker", MarkerArray, queue_size=5)
rospy.Subscriber("/move_base_simple/goal", PoseStamped, click_goal_callback)
rospy.Subscriber("clicked_point", PointStamped, clicked_callback)
show_arrow()
# 订阅move_base_sa
rospy.spin()

启动

wj_run.py

启动脚本,集成了底盘launch文件,导航launch文件,控制主程序wj_go_hh.py

1
2
3
4
5
6
7
8
9
10
11
12
13
14
import subprocess
import time
import os

subprocess.Popen("roslaunch racecar Run_car.launch", shell=True, stdout=subprocess.DEVNULL, stderr=subprocess.DEVNULL)
print("Run_car.launch已执行")
time.sleep(3)
subprocess.Popen("roslaunch racecar amcl_nav_wy.launch", shell=True, stdout=subprocess.DEVNULL, stderr=subprocess.DEVNULL)
print("amcl_nav_wy.launch已执行")
time.sleep(2)

# 启动 python 脚本
cmd = "python3 /racecar/src/auto_car/scripts/wj_go_hh.py"
os.system(cmd)

amcl_nav_wy.launch

Run_car.launch文件上面已经介绍过了,这里就不介绍了,acml_nav_wy.launch文件是导航控制文件
该文件同级目录下还有一个文件acml_nav.launch,是官方原文件,这里对他进行了修改,主要在move_base进行修改,由于实际上局部路径规划并没有用到,这里就将其注释掉了,其中,该文件,调用了acml,controller也会介绍
param name=”base_global_planner” value=”navfn/NavfnROS”/该文件中使用的全局路径规划器为NavfnROS,而不是GlobalPlanner,由于时间较短没有测试两者区别。
这里的controller控制器代替了局部路径规划器的功能。
这里介绍一下导航控制代码的总体思路。
wj_run.py脚本会启动底盘节点,导航节点,wj_go_hh.py文件。
wj_go_hh.py会读取之前打点的参数文件,按先后顺序发布,导航节点会调用全局路径规划器,计算出此时位置倒目标点的路径,由node pkg=”racecar” type=”car_controller_new” respawn=”false” name=”car_controller” output=”screen运行的car_controller_new.cpp文件负责发布car/cmd_vel速度与舵机话题控制下位机实现底盘运动。这个代码后面会介绍。

1
2
3
4
5
6
7
8
9
10
11
12
13
14
15
16
17
18
19
20
21
22
23
24
25
26
27
28
29
30
31
32
33
34
35
36
37
38
39
40
41
42
43
44
45
46
47
48
49
50
51
52
53
54
55
56
57
58
59
60
61
62
63
64
65
66
67
68
69
70
71
72
73
74
75
76
77
<?xml version="1.0"?>

<launch>
<arg name="use_rviz" default="flase" />

<!-- for amcl -->
<arg name="init_x" default="0.0" />
<arg name="init_y" default="0.0" />
<arg name="init_a" default="0.0" />

<!-- Map server -->
<node pkg="tf" type="static_transform_publisher" name="map_to_odom" args="0.0 0.0 0.0 0 0 0.0 /map /odom 1000"/>
<node pkg="tf" type="static_transform_publisher" name="base_to_laser" args="0.0 0.0 0.0 0 0 0.0 /base_link /laser 1000"/>

<node name="map_server" pkg="map_server" type="map_server" args="$(find auto_car)/rengong.yaml"/>


<!-- ODOMETRY -->
<!--rf2o_Laser_Odometry-->
<include file="$(find racecar)/launch/includes/rf2o.launch.xml" />
<!-- wheel odometry -->
<include file="$(find encoder_driver)/launch/wheel_odom.launch"/>
<!-- Robot_Localization -->
<node pkg="robot_localization" type="ekf_localization_node" name="ekf_se" clear_params="true">
<rosparam command="load" file="$(find racecar)/param/ekf_params.yaml" />
</node>

<!-- Localization -->
<!-- AMCL -->
<include file="$(find racecar)/launch/includes/amcl.launch.xml">
<arg name="init_x" value="$(arg init_x)"/>
<arg name="init_y" value="$(arg init_y)"/>
<arg name="init_a" value="$(arg init_a)"/>
</include>

<!-- Navstack -->
<node pkg="move_base" type="move_base" respawn="false" name="move_base">
<!-- local planner -->
<!--
<param name="base_global_planner" value="global_planner/GlobalPlanner"/>
-->
<param name="base_global_planner" value="navfn/NavfnROS"/>
<!--param name="base_local_planner" value="dwa_local_planner/DWAPlannerROS"/-->


<!--rosparam file="$(find racecar)/param/dwa_local_planner_params.yaml" command="load"/-->
<!-- costmap layers -->
<!-- rosparam file="$(find racecar)/param/local_costmap_params.yaml" command="load"/-->
<rosparam file="$(find racecar)/param/global_costmap_params.yaml" command="load"/>
<!-- move_base params -->
<rosparam file="$(find racecar)/param/base_global_planner_params.yaml" command="load"/>
<rosparam file="$(find racecar)/param/move_base_params.yaml" command="load"/>
<remap from="/odom" to="/odometry/filtered"/>


</node>

<node pkg="racecar" type="car_controller_new" respawn="false" name="car_controller" output="screen">

<param name="Vcmd" value="2.0" /> <!--speed of car m/s -->
<!-- ESC -->
<param name="baseSpeed" value="60"/>
<param name="baseAngle" value="0.0"/>
<param name="Angle_gain_p" value="-5.0"/>
<param name="Angle_gain_d" value="-0.0"/>
<param name="Lfw" value="1.5"/>
<param name="vp_max_base" value="80"/>
<param name="vp_min" value="50"/>

</node>

<!-- Rviz -->
<!-- <node pkg="rviz" type="rviz" name=:"rviz" args="-d $(find racecar)/rviz/amcl.rviz" if="$(arg use_rviz)" /> -->
</launch>

amcl.launch.xml

src\racecar\launch\includes\amcl.launch.xml
该文件是acml配置文件
其中param name=”tf_broadcast” value=”false”/
该参数表示是否将计算的位姿发布到全局,这里我选择了false,由于之前的一代车雷达位姿计算不准,导致位姿乱跳,二代车位姿尚可,但未测试。
在位姿计算准确的情况下,可以防止车辆跑的过程中雷达扫到的图和与建的图不重合,有较大偏差。其他参数chat搜索。自行添加注释

1
2
3
4
5
6
7
8
9
10
11
12
13
14
15
16
17
18
19
20
21
22
23
24
25
26
27
28
29
30
31
32
33
34
35
36
37
38
39
40
41
42
43
44
45
46
47
48
49
50
51
52
53
54
55
56
57
<?xml version="1.0"?>

<launch>
<arg name="init_x" default="0" />
<arg name="init_y" default="0" />
<arg name="init_a" default="0" />

<node pkg="amcl" type="amcl" name="amcl" output="screen">
<!-- Publish scans from best pose at a max of 10 Hz -->
<param name="transform_tolerance" value="1.0" />
<param name="gui_publish_rate" value="10.0"/>
<param name="laser_max_beams" value="10"/>
<param name="min_particles" value="100"/>
<param name="max_particles" value="5000"/>
<param name="kld_err" value="0.01"/>
<param name="kld_z" value="0.99"/>
<!-- translation std dev, m -->
<param name="odom_alpha1" value="0.2"/>
<param name="odom_alpha2" value="0.2"/>
<param name="odom_alpha3" value="0.8"/>
<param name="odom_alpha4" value="0.2"/>

<param name="laser_z_hit" value="0.5"/>
<param name="laser_z_short" value="0.05"/>
<param name="laser_z_max" value="0.05"/>
<param name="laser_z_rand" value="0.5"/>
<param name="laser_sigma_hit" value="0.2"/>
<param name="laser_lambda_short" value="0.1"/>
<param name="laser_model_type" value="likelihood_field"/>

<!-- <param name="laser_model_type" value="beam"/> -->
<param name="laser_likelihood_max_dist" value="4.0"/>
<param name="update_min_d" value="0.1"/>
<param name="update_min_a" value="0.1"/>
<param name="resample_interval" value="2"/> <!--//在重采样前需要的滤波更新的次数,默认2-->
<param name="transform_tolerance" value="0.2"/> <!--tf变换发布推迟的时间-->
<param name="recovery_alpha_slow" value="0.0"/> <!-- 慢速速的平均权重滤波的指数衰减频率,用作决定什么时候通过增加随机位姿来recover,默认0(disable)-->
<param name="recovery_alpha_fast" value="0.0"/> <!-- 快速的平均权重滤波的指数衰减频率,用作决定什么时候通过增加随机位姿来recover,默认0(disable),可能0.001是一个不错的值-->

<param name="use_map_topic" value="true"/>
<param name="first_map_only" value="true"/>
<param name="tf_broadcast" value="false"/>

<param name="odom_frame_id" value="odom"/>
<param name="global_frame_id" value="map"/>
<param name="base_frame_id" value="base_footprint"/>
<param name="odom_model_type" value="diff"/>

<param name="initial_pose_x" value="$(arg init_x)"/>
<param name="initial_pose_y" value="$(arg init_y)"/>
<param name="initial_pose_a" value="$(arg init_a)"/>
<param name="initial_cov_xx" value="0.25" />
<param name="initial_cov_yy" value="0.25" />
<param name="initial_cov_aa" value="0.2" />
</node>
</launch>

amcl.launch.xml

src\racecar\src\car_controller_new.cpp
代码很长,这里就不放了,自行下载源代码查看。
这个代码很重要,我将其中的舵机限幅改大了,并注释掉了到达目标点后,发布速度为0,舵机打角为0的部分,实际上发布的节点是car/cmd_vel,舵机打角0度,向右偏到最大,90才是正中,修复到达目标点后计算并突然左打角的BUG.

wj_go_hh.py

src\auto_car\scripts\wj_go_hh.py
控制主程序思路读取打点的配置文件,发布目标点,检测自身位置,当目标点与自身位姿小于参数Distance_min(单位m)时,发布下一个目标点
停车思路,这里并没有实际检测红绿灯和斑马线,而是采用定点的方式,首先将参数start_light_post ,white_go ,while_back 写入,横纵坐标,写入后程序会检测打点配置文件中哪些目标点与这些停车点距离最近,在发布到这个目标点时,先停车一段时间后,在出发,停车采用发布/light话题,car_controller_new节点接受到后就会停车。

1
2
3
4
5
6
7
8
9
10
11
12
13
14
15
16
17
18
19
20
21
22
23
24
25
26
27
28
29
30
31
32
33
34
35
36
37
38
39
40
41
42
43
44
45
46
47
48
49
50
51
52
53
54
55
56
57
58
59
60
61
62
63
64
65
66
67
68
69
70
71
72
73
74
75
76
77
78
79
80
81
82
83
84
85
86
87
88
89
90
91
92
93
94
95
96
97
98
99
100
101
102
103
104
105
106
107
108
109
110
111
112
113
114
115
116
117
118
119
120
121
122
123
124
125
126
127
128
129
130
131
132
133
134
135
136
137
138
139
140
141
142
143
144
145
146
147
148
149
150
151
152
153
154
155
156
157
158
159
160
161
162
163
164
165
166
167
168
169
170
171
172
173
174
175
176
177
178
179
180
181
182
183
184
185
186
187
188
189
190
191
192
193
194
195
196
197
198
199
200
201
202
203
204
205
206
207
208
209
210
211
212
213
214
215
216
217
218
219
220
221
222
223
224
225
226
227
228
229
230
231
232
233
234
235
236
237
238
239
240
241
242
243
244
245
246
247
248
249
250
251
252
253
254
import rospy
from geometry_msgs.msg import Twist
from geometry_msgs.msg import PoseWithCovarianceStamped

import math
import numpy as np

from wj_pid import PID

import json
import time

from nav_msgs.msg import Odometry
from std_msgs.msg import String, Float64
from move_base_msgs.msg import MoveBaseActionResult
from actionlib_msgs.msg import GoalStatusArray
from geometry_msgs.msg import PoseStamped, PoseWithCovarianceStamped

# 参数配置,
# 角度从车右方逆时针旋转
Angle_min = 50.0 #右拐最大角
Angle_max = 130.0 #左拐最大角
Angle_mid = 90.0 #中间值

Speed_max = 1700
My_Speed = 1630

now_Goal=[0,0,0,1]

Distance_min = 1.0


is_start_light = 1 #是否开启红绿灯定点?
light_index = 0
light_flag = 0

is_white = 1 #是开启斑马线定点?
white_go_index = 0
while_back_index = 0
white_flag = 0

is_rest = 0 #开启定点纠偏
rest_index = 0
rest_post = [6.18,-1.40]
rest_flag = 0

# 参数修改
start_light_post = [[8.39,-0.1],[10.8,-0.4],[12.6,-0.2],[7.25,-1.87],[10,-2],[12.3,-1.9]]
white_go = [3.0, -0.5]
while_back = [3.5,-1.1]

def find_closest_point(start_light_post, post):
'''
my_list格式为[[a,b],[c,d],[e,f]...]
my_post格式为[a,b]
该函数会返回my_list距离my_post最近的坐标的下标
'''
# 提取每个点的 x 和 y 坐标
points = np.array(start_light_post)[:, :2]
# 计算每个点与post的距离
distances = np.sqrt((points[:, 0] - post[0])**2 + (points[:, 1] - post[1])**2)
# 返回距离最小的点的下标
return np.argmin(distances)


def send_goal(to_Goal, map_frame):
goal_msg = PoseStamped()
goal_msg.header.stamp = rospy.Time.now()
goal_msg.header.frame_id = 'map' # 坐标系应与目标点一致,通常是地图坐标系
goal_msg.pose.position.x = to_Goal[0] # 替换为目标点的 x 坐标
goal_msg.pose.position.y = to_Goal[1] # 替换为目标点的 y 坐标
goal_msg.pose.position.z = 0.0 # 替换为目标点的 z 坐标
# 设置目标点的姿态,通常不需要设置
goal_msg.pose.orientation.x = 0.0
goal_msg.pose.orientation.y = 0.0
goal_msg.pose.orientation.z = to_Goal[3]
goal_msg.pose.orientation.w = to_Goal[2]
# 发布目标点
goal_publisher.publish(goal_msg)
rospy.loginfo("Goal sent!")

class go_to:
def __init__(self):
self.pose_amcl = rospy.Subscriber('/odometry/filtered',Odometry,self.amcl_pose_callback,queue_size=1)
# self.pose_amcl = rospy.Subscriber("/amcl_pose", PoseWithCovarianceStamped, self.amcl_pose_callback, queue_size=10)
self.now_position = [0,0,0,1]

def amcl_pose_callback(self, data):
position = data.pose.pose.position
orientation = data.pose.pose.orientation
self.now_position = [round(position.x, 3), round(position.y, 3), round(orientation.z, 3), round(orientation.w, 3)]


class controll:
def __init__(self,Angle_min,Angle_max,Angle_mid,Speed_max,My_Speed):
self.pub_speed = rospy.Publisher('/car/cmd_vel', Twist, queue_size=1)
self.Angle_min=Angle_min
self.Angle_max=Angle_max
self.Angle_mid=Angle_mid
self.Speed_max=Speed_max
self.My_Speed=My_Speed
self.pid = PID(Kp=1.2, Ki=0, Kd=0, setpoint=0)

self.pub_stop = rospy.Publisher('/light', String, queue_size=1)

def go_goal(self,To_Goal,Now_Goal):
'''
To_Goal表示目标点,为一个列表,内有4个数据,依次为,位置x,位置y,方向z,方向w
Now_Goal表示当前位置
'''
vector_point=[To_Goal[0]-Now_Goal[0],To_Goal[1]-Now_Goal[1],0]
print("vector_point"+str(vector_point))
ang = quaternion_to_euler(Now_Goal[2], Now_Goal[3])
print("ang"+str(ang))
ang = ang*math.pi/180
print("ang"+str(ang))
vector_angle = [round(math.cos(ang), 3),round(math.sin(ang), 3),0]
print("vector_angle"+str(vector_angle))
final_ang = angle_between_vectors(vector_angle, vector_point)
return final_ang

def angle_control(self,angle_1):
angle_2 = self.Angle_mid + self.pid.update(angle_1)
print("angle_2", angle_2)

# 舵机限幅
if angle_2 < self.Angle_min:
return self.Angle_min
elif angle_2 > self.Angle_max:
return self.Angle_max
else:
return angle_2

def publish_velocity(self, linear_x, angular_z):
twist = Twist()
twist.linear.x = linear_x
twist.linear.y = 0
twist.linear.z = 0
twist.angular.z = angular_z
twist.angular.x = 0
twist.angular.y = 0
self.pub_speed.publish(twist)

def work1():
rospy.spin()
# print("to_Goal",to_Goal)
# print("now_Goal",go_to_obj.now_position)


if __name__ == "__main__":
with open('/racecar/src/auto_car/scripts/waypoint.json', 'r') as f:
data = json.load(f)
f.close()

index_point=0
waypoint = data["waypoint"]
print(waypoint)
point_len = len(waypoint)

print("go?")
www = 5
aaa=input()

start_time = time.time()

if is_start_light == 1:
# 开启定点
light_index = find_closest_point(waypoint, start_light_post[int(www)])
print("最经点的下标为:" + str(light_index))
white_go_index = find_closest_point(waypoint,white_go)
while_back_index = find_closest_point(waypoint,while_back)
rest_index = find_closest_point(waypoint,rest_post)

rospy.init_node("wj_go", anonymous=True)
go_to_obj = go_to()
control = controll(Angle_min,Angle_max,Angle_mid,Speed_max,My_Speed)
goal_publisher = rospy.Publisher('/move_base_simple/goal', PoseStamped, queue_size=10)
map_frame = rospy.get_param('~map_frame', 'map' )
time.sleep(1)
# t1 = Thread(target=work1)
# t1.start()
to_Goal = [waypoint[index_point][0],waypoint[index_point][1],waypoint[index_point][2],waypoint[index_point][5]]
send_goal(to_Goal,map_frame)
while True:
now_Goal = go_to_obj.now_position
distance = np.sqrt((to_Goal[0]-now_Goal[0])**2+(to_Goal[1]-now_Goal[1])**2)
if (distance <= Distance_min and index_point <= point_len-1):

if index_point == point_len -1 :
pass
print("over")
finish_time = time.time()
print(finish_time-start_time)
while True:
control.publish_velocity(1200,90)
index_point = index_point + 1


if index_point == rest_index and is_rest == 1 and rest_flag == 0:
now_time = time.time()
control.pub_stop.publish("red")
while time.time()-now_time < 2.3:
pass
#control.publish_velocity(1200,90)
control.pub_stop.publish("green")

rest_flag = 1


if index_point == light_index and is_start_light==1 and light_flag == 0:

now_time = time.time()
control.pub_stop.publish("red")
while time.time()-now_time < 2.3:
pass
#control.publish_velocity(1200,90)
control.pub_stop.publish("green")

light_flag = 1


if index_point == white_go_index and is_white ==1 and white_flag == 0:

now_time = time.time()
control.pub_stop.publish("red")
while time.time()-now_time < 2.3:
pass
#control.publish_velocity(1200,90)
control.pub_stop.publish("green")

white_flag = 1

if index_point == while_back_index and is_white ==1 and white_flag == 1:

now_time = time.time()
control.pub_stop.publish("red")
while time.time()-now_time < 2.3:
pass
#control.publish_velocity(1200,90)
control.pub_stop.publish("green")

white_flag = 2

to_Goal = [waypoint[index_point][0],waypoint[index_point][1],waypoint[index_point][2],waypoint[index_point][5]]


send_goal(to_Goal,map_frame)


改进

代码介绍完毕,下面介绍一下改进的思路。

  • 由于主程序是一个一个点发布的,每次导航只是专注于此时的目标点,导致路径不平滑,有时由于拐的太大,在下一个目标点,无法回正到正确的轨迹,可尝试对打点的参数文件做平滑处理
  • controller_new.cpp文件中还有bug没修改,并且这个控制器不好用,可以自己写一个
  • 可以关闭controller,启用局部路径规划,衔接局部路径规划和底盘的代码

赛后结果及其感悟

三个队,国一,国二,国三,结果还行,没崩。